Thursday, September 30, 2010

Diaper/Wipes Case and Some Burp Cloths

I made these for a friend of mine who has a baby shower coming up.
(I hope she doesn't see these ahead of time!)

The diaper/wipes case is big enough to fit a travel size wipes case along with 2-3 diapers. These come in handy when you use more than one diaper bag... Just pull this out of one bag and put it in the other! The closure on this is a magnetic snap, but velcro would work just as well.

With the burpies I couldn't decide on what I wanted to make them out of. I wanted something absorbent... and I know that flannel will probably have the spit up roll right off. (Although I have tons of baby print flannel that I need to use up!) So I bought some terry cloth fabric... washed it and sewed one. I didn't really like the texture of it. A bit rough for newborn skin. So the next one I made with some white minky. Perfect. I'm not sure how absorbent minky is, but it's super soft!

I've decided I'm giving her both of them... I figure the one with the terry cloth would be good for some of the bigger messes as the baby gets older.

I'm definitely going to be making lots more of these in the next month or so. I need a diaper/wipes case to match my new diaper bag! I also need a bunch of new burp cloths for Baby Josiah coming next January. Not to mention for my sister and her new baby coming in February! :)

I have LOTS of sewing to get done in 4 months.

Wednesday, September 29, 2010

My New Diaper Bag

I found this cute owl print corduroy fabric on sale at Joann's a couple weeks ago and I couldn't resist. I knew I wanted to make something for myself out of it... I decided on a new diaper bag. I've been dreaming of sewing myself a bag for about 5 years now. (Crazy, right?) So I finally took the plunge yesterday!

I think it turned out really cute!

This bag measures about 18.5" wide by 12" tall. Magnetic snap closure on the top. 3 pockets on the outside front, one large pocket in the back and a large zippered pocket on the inside.


Now that I've finished the bag and have put all my personal belongings in it I can see a few improvements I would make for the next time... 

Instead of just putting interfacing in the pockets, bottom and straps I would also add it to the main body of the bag. Not sure why I didn't... I guess I figured having the pockets lined would be good enough. It works ok without the extra interfacing, but I think I like the feel of a more sturdy bag. 

I would also add a Velcro or button closure to the large back pocket... or even splitting up the back pocket to 2 smaller pockets. As it is right now it kind of falls open when the inside of the bag is full.

Another thing I would add is 2 pockets on the inside. One to fit my cell phone and one to fit my camera.

Other than those small improvements I really love this bag and I'm happy I decided to make it. I'll probably make one for my sister as a Christmas present with the improvements and see how I like it. Once I get things right I might even decide to start selling these! We'll see...

Tuesday, September 28, 2010

A Great Way To Save Their Art Work

Right now my sons mostly just scribble. 
They'll tell me it's a rabbit or an airplane... but it still looks like a bunch of scribbles to me. 

So I can't wait til they can start drawing real pictures that I can save just like this...
Isn't this so cute?! 
It sure beats just hanging it on the fridge!
The finished project can be found here.
More on how to make it can be found here.

Monday, September 27, 2010

Cream Cheese Buttscotch Brownies

Don't those look sooooo yummy?! 
I've been in the baking sort of mood lately... only it's been too hot to even attempt it.
So for now THESE will just have to wait on my to-do list.

....patiently waiting on the real fall weather to start...

Sunday, September 26, 2010

Toddler Backpack Pattern

I saw this tutorial last year and have been meaning to make it ever since. Now that I have a new sewing machine and some cute fabric to work with I have the motivation! I'm thinking these will turn into some Christmas or even birthday gifts for the boys. (There's really no difference since their birthdays are so close to Christmas anyway...)

I love that this tutorial even has a free pattern that you can download and print out. Can't get much easier than that! And can you imagine all the fabric possibilities with this one? I'm thinking a SpiderMan/Red one for my oldest and maybe a car/truck/blue one for my youngest.

Saturday, September 25, 2010

Throw Pillow Slip Cover - Made by Me!

What's this? Something that I actually made? AND I'm posting about how I did it!?
Weird.

I've been meaning to make a slip cover for this pillow form since I was pregnant with Brady... He's now 20 months old. It was originally meant to be made into a Disney Princess pillow for my niece. (I can't find the fabric any more. Opps.) So for now it has a Chargers slip cover in honor of my football team!
(Go Bolts!)

So here's how I did it:
1. I started with a pillow form that I bought from Walmart long, LONG ago. It measures 13" x 13". (Seems like a weird size to me, but that's what it is...)
2. Cut one big square measuring 14" x 14". (Added 1/2" all around for the seams.)
3. Cut 2 small rectangles measuring 9.5" x 14". (These pieces are the same length as the square piece on the long edge. The short edge is the length (14") divided in half  and add 2.5" ) Make sense?
4. I used a drinking glass to help me round the edges for a neater look. Rounded all 4 corners of the square piece and the top 2 and bottom 2 of my rectangle pieces.

5. Next I did a straight stitch across the edges of the straight sides of the rectangle pieces. Folding the fabric over twice to hide the raw edges.
6. Once I finished sewing, it was time to pin everything in place. Right sides together I pinned the top rectangle piece to the square. Then I pinned the bottom rectangle to the square.. overlapping the top rectangle.


7. When every thing was pinned in place I sewed around the entire square. Starting and stopping in the same place. 
8. Turn the slip cover right side out and stuff your pillow!


All finished and sitting nicely on my rocking chair. 
When football season is over I'll probably make a new slip cover to match our living room a little bit better. :)

I see more slip covers in my future now that I've realized how easy the are to make without using a zipper. Zippers are something I haven't mastered yet. They intimidate me!

Friday, September 24, 2010

Smores Brownies

I love brownies and I LOVE S'Mores!
...and that's why I have to try this recipe!


Don't they look soooo yummy?!
Mmmmm...

Thursday, September 23, 2010

My Finished Sewing Machine Cover!

Just wanted to show off my new sewing machine cover that I managed to make during nap time yesterday! It was pretty easy to do... Just measured the length, width and height of the machine, cut out a huge rectangle, a piece for the back and some pieces for the front ties and sewed them all together. I used the table cloth I mentioned in yesterdays post.

I think it turned out pretty well. :)

Front of the machine.
I didn't have any matching ribbon so I made the ties out of the same fabric.

The back of the cover.
Probably could have sewn that strap just a bit lower, but I think it still looks okay.

Wednesday, September 22, 2010

Sewing Machine Cover

In case you haven't heard, my husband bought me a new sewing machine last week! I love it and have made several things on it already. Pretty soon I'll be able to start posting more of my own work along with a link if I made it using a tutorial.

Which brings me to this...

I had thought about buying one of those hard cases I saw for sale at Walmart... but how much more fun would it be to make my own?! I have this gorgeous table cloth that I bought from Target last year that I plan to use for it. It's too big for the desk I've been using it on. (I actually fold it in half.) So there's plenty of extra fabric for this project!

I found the picture above over at Make it and Love it
However, there's also a great tutorial over on Nap Time Journal.

Tuesday, September 21, 2010

Kitchen Art

Like I mentioned a couple posts back... I need some serious help in decorating my home. I came across these and couldn't resist posting about them! I think these would look super cute in my kitchen with the right colors. I have the frames. I have the fabric. I have the silverware. I have the batting. All I would need to go buy is the spray paint! 

I making some of these ASAP!

Tutorial can be found on the same blog as yesterdays post - here.

Monday, September 20, 2010

Fabric Covered Composition Book

Two things I've been obsessed with lately... Fabric and Notebooks.
The fabric is pretty self explanatory. I love the bright colors, shapes and patterns. I love the different textures... etc, etc, etc. 
As for notebooks - I carry one with me every where. Seriously. I use it for reminder notes, shopping lists, driving directions... Just about anything.

I can't wait to make one of these! I'm now kicking myself for not snapping up a ton of those 1 cent notebooks I saw on sale for back to school. (Maybe next year.)

Tutorial can be found here.

Sunday, September 19, 2010

Fabric Wall Art

When it comes to decorating my home I completely fail. Maybe it's because I just can't find the time... or have the money to do it... Maybe it's because I move around too much. Either way, my walls could use some livening up! This looks like a good start...


How pretty is that?! Maybe someday I'll have my own space that I can decorate like this. 
The tutorial can be found here.

Saturday, September 18, 2010

Interchangable Ribbon Necklaces - Very Cute!

One of my favorite craft blogs is Infarrantly Creative. She always has the coolest projects going on...
I wish I could be more like her. Seriously.

Check out this awesome ribbon necklace tutorial.
Aren't they so cute?!


Friday, September 17, 2010

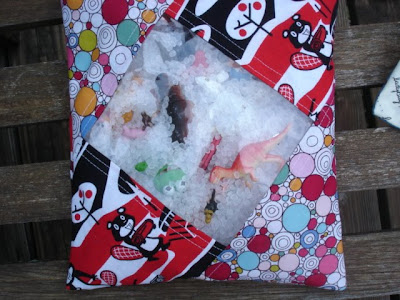
I Spy Bags

I've been meaning to make one of these for about a year now. I think they would make good toys for car rides and for staying quiet in church. I just need to get to Joann's and buy some of the plastic material and I need to find a store that carries the beads... 
Someday.


There are many tutorials on the internet if you search. This particular one was found here.

Thursday, September 16, 2010

I Can Sew Again!

Last night my hubby took me out to buy a new sewing machine. (Love him!) I ended up choosing this one on sale. Not the machine that I've been dreaming about getting, but so far I think it's an awesome sewing machine at a really good price! Who knew sewing could be so easy?!

I've had it less than 24 hours and look what I've done...

This is the second trick-or-treat bag I've made in a week... 
The first one was made using my mom's cheap Brother sewing machine. It works ok, but nothing like my new one! My stitches were straight and even and it just feels like it's better constructed than the first.

Oh and did I mention how quiet this machine is? 
I'm in LOVE!

Second sewing project of the day was this fabric key chain I just made.
I posted about it several days ago.
I think it turned out pretty cute... Although it would have worked out better if I had a wider ribbon. This one was really hard to sew on because it was covering a thick seam. (Which by the way, my old machine would have laughed at me and then quit working. This one kept going like a total champ)

Next item on the to-do list..
Chargers throw pillow slip covers, sewing machine cover and a lip gloss cozy!

Lipgloss Cozy

Anyone that knows me knows that I am obsessed with Chapstick. 
I need one of these A.S.A.P.!

The tutorial can be found here.

Wednesday, September 15, 2010

Beaded Keychains

Found a tutorial for these cute gift ideas on Tatertots and Jello. Makes me wish I didn't sell all of my beads!

Tuesday, September 14, 2010

Homemade Poptarts

My kids love Poptarts... Me, not so much.
Today I came across this awesome post that could help us meet in the middle.
(I've never tried Nutella, but I hear it's awesome!)

The original recipe can be found here.

Monday, September 13, 2010

Hanging Fabric Storage Baskets


My boys would probably rip these off the wall, but they're still really cute and I still want to make them someday... Maybe if I ever have a girl. ;)

Tutorial can be found here.

Sunday, September 12, 2010

Baby Blanket Inspiration

I'm always on the lookout for cute projects to do for the newest baby boy that's joining our family next year. I just wish I had a sewing machine to make all of this stuff!

The squares for these were made out of a thrift store find.. some brand new, in package receiving blankets. The original post can be found here.

Saturday, September 11, 2010

Happy Halloween Wreath

Usually I don't start thinking about Halloween stuff until October 1st. This year BOTH my boys are old enough to walk door to door trick-or-treating this year. To say that I'm getting excited for Halloween is an understatement! When I saw this wreath I knew I wanted one for our front door!


The tutorial for this Happy Halloween Wreath can be found here.

Friday, September 10, 2010

Make Your Own Fabric Keychain


I first came across these cute fabric keychains while searching through Etsy. I figured there had to be a tutorial out there some where... so I googled it and came across The Idea Room via the blog Ucreate. She has one of the easiest and best picture tutorials that I found for this. You can find the instructions here. Can't wait to get my new sewing machine so I can make these!

Thursday, September 9, 2010

Rag Quilt

I actually just made one of these for my son, but haven't uploaded any of the pictures yet. It's the first (and only) quilt I've ever attempted to make. I love how easy they are to make! You can google "Rag Quilt" and tons and tons of links will pop up with instructions on how to make them. Here's one that I just happen to love the look of.


Found here.

Wednesday, September 8, 2010

An Altered Picture Frame

The kids and I went to Michaels today to buy some Halloween cookie cutters. I know it's not even October yet, but I'm anxious to make some pumpkin shaped sugar cookies! ANYWAY, while I was there I was looking at the $1 wooden frames that they sell and trying to think of something to make out of them. I ended up leaving the store without it, but while I was out it hit me to glue a bunch of cute buttons (which they also sell there) to it and write at the bottom, "Cute as a Button". Add a baby picture to it and, TA-DA! 

Tried to find a similar looking craft online, but couldn't find exactly what I was looking for. Instead I did come across this wooden picture frame... 


Not exactly what I was searching for, but I think this would make a really cute gift!

Tuesday, September 7, 2010

Sew Your Own Cosmetic Bags

I think I'm drawn to all the sewing projects because my sewing machine died this month and I'm in desperate need of a new one! So far it's looking like I'll be waiting til January til we can afford a new one. :( This will have to stay on my to-do list until then. These cosmetic bags are so cute! I can't wait to make some for my friends and family.

Download the instructions here.

Monday, September 6, 2010

Happy Meal Toy Wreath

I suppose some people might think this one isn't a 'Pretty Little Craft', however, if you have little ones like I do you might think this is a cool way to do something with all those 'junk' toys they have laying around. When I saw this Happy Meal Toy Wreath I instantly thought of the playroom at my mom's house. She has lots of fun stuff hanging up on the walls and this would make the perfect addition! 


Sunday, September 5, 2010

Super Cute Tote Bags

Found this tote bag tutorial on the same website as the Hobo Bags I posted about a few days ago. I just love all the detailed pictures and the simple instructions. Also love that there's a printable version of the instructions!


Tutorial found here.
Printable version here.

Saturday, September 4, 2010

Beautiful Nursing Cover


Both my sister and I are pregnant with babies due at the beginning of next year. So yes, babies are very much on my mind! I really wanted a cute nursing cover like this when I was pregnant with my second son, but never wanted to pay the price tag. Now that I have a sewing machine and plenty of fabric I plan to make a few!

The one pictured above can be found in this tutorial.

Friday, September 3, 2010

Baby Binkie Bunnies


Last week I found out that I'm having yet another baby boy due (#3!) at the end of January and that means I have nothing but baby on my mind! (Ok maybe not since I do still have a household to run and two little ones to fed, dress and take care of.) 

When I saw this cute lil bunny I knew I wanted to make it. How adorable is this?! Seriously. Then I took a look at all the other stuff this awesome blog contained... 

Oh my. I'm in heaven.

Thursday, September 2, 2010

Fabric Beaded Necklace

I keep seeing these fabric beaded necklaces pop up every where on the internet. I think they're so cute, seem easy to make and there's so many different color options for you to choose from! This is on my definite to-do list. 


Tutorial can be found here

Wednesday, September 1, 2010

Recycled 2-Color Tee Skirt

I love an old t-shirt... Like those ones that are so soft and comfy from all the wearing and washing it went through over the years. This tutorial is a great way to re-use them to make something new! If you don't have any old tees laying around you can always find some at your local thrift store for pretty cheap.